AWS Elasticsearch Tutorial: Your First Cluster

AWS's Elasticsearch Service has come a long way from when it was first introduced, and we at Gigasearch feel it is ready for most production workloads. It eliminates much of the pain of operating Elasticsearch yourself, allowing you to focus on your application and business.
If you've never set up an Elasticsearch cluster before, AWS Elasticsearch can be somewhat unintuitive. In this AWS Elasticsearch Tutorial, we'll walk through (and provide some discussion around) the steps to provision a cluster on AWS's Elasticsearch Service.
Step 1: Choose Deployment Type
The first step in creating an AWS ES "Domain" (an Elasticsearch cluster) is to select a deployment type:
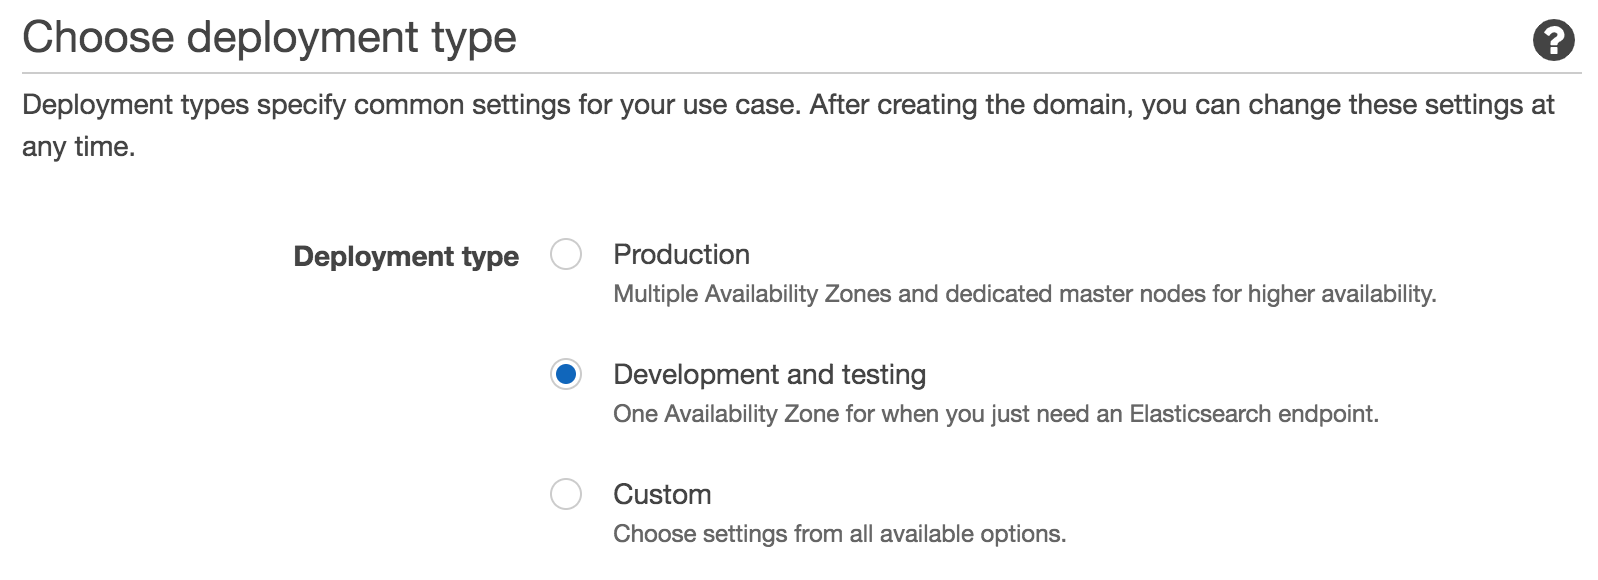
The "Production" deployment type forces you to have at least 2 Availability Zones (AZ) for your cluster. Having multiple availability zones is important for a production cluster because Elasticsearch replicates data. With multiple AZ's, your cluster's data nodes can be spread across multiple data centers, for higher cluster availability. Replica shards will be placed (assigned to a data node) such that they are spread across multiple AZ's, giving you significantly better data availability guarantees. So if, in some sort of freak accident one AWS data center goes offline, your data will still be accessible from another AZ.
If you're just starting out and want to set up a test cluster, go with the "Development and Testing" option. This will be cheaper, since you can set up a single node cluster.
You'll also pick your Elasticsearch version on this step. The options range from a very recent version (7.1 at the time of writing), all the way back to 1.5 (released in 2009). If you're a new user of Elasticsearch and have no legacy requirements, we strongly recommend picking the latest version. Elasticsearch development proceeds at a breakneck pace, with a new major version released approximately every year. Significant improvements and changes are made with each major version, including critical bug fixes. Data files are not forward-compatible beyond one major version, so keeping current with major Elasticsearch versions is important to your cluster's long-term maintenance. Minor version updates also include important bug fixes, but are easier to upgrade to.
Step 2: Configure Cluster
Elasticsearch domain Name
This is straight forward, just choose a name for this cluster that's unique within your account and region, and obeys the rules: start with a lowercase letter and must be between 3 and 28 characters. Valid characters are a-z (lowercase only), 0-9, and - (hyphen).
Data Instances
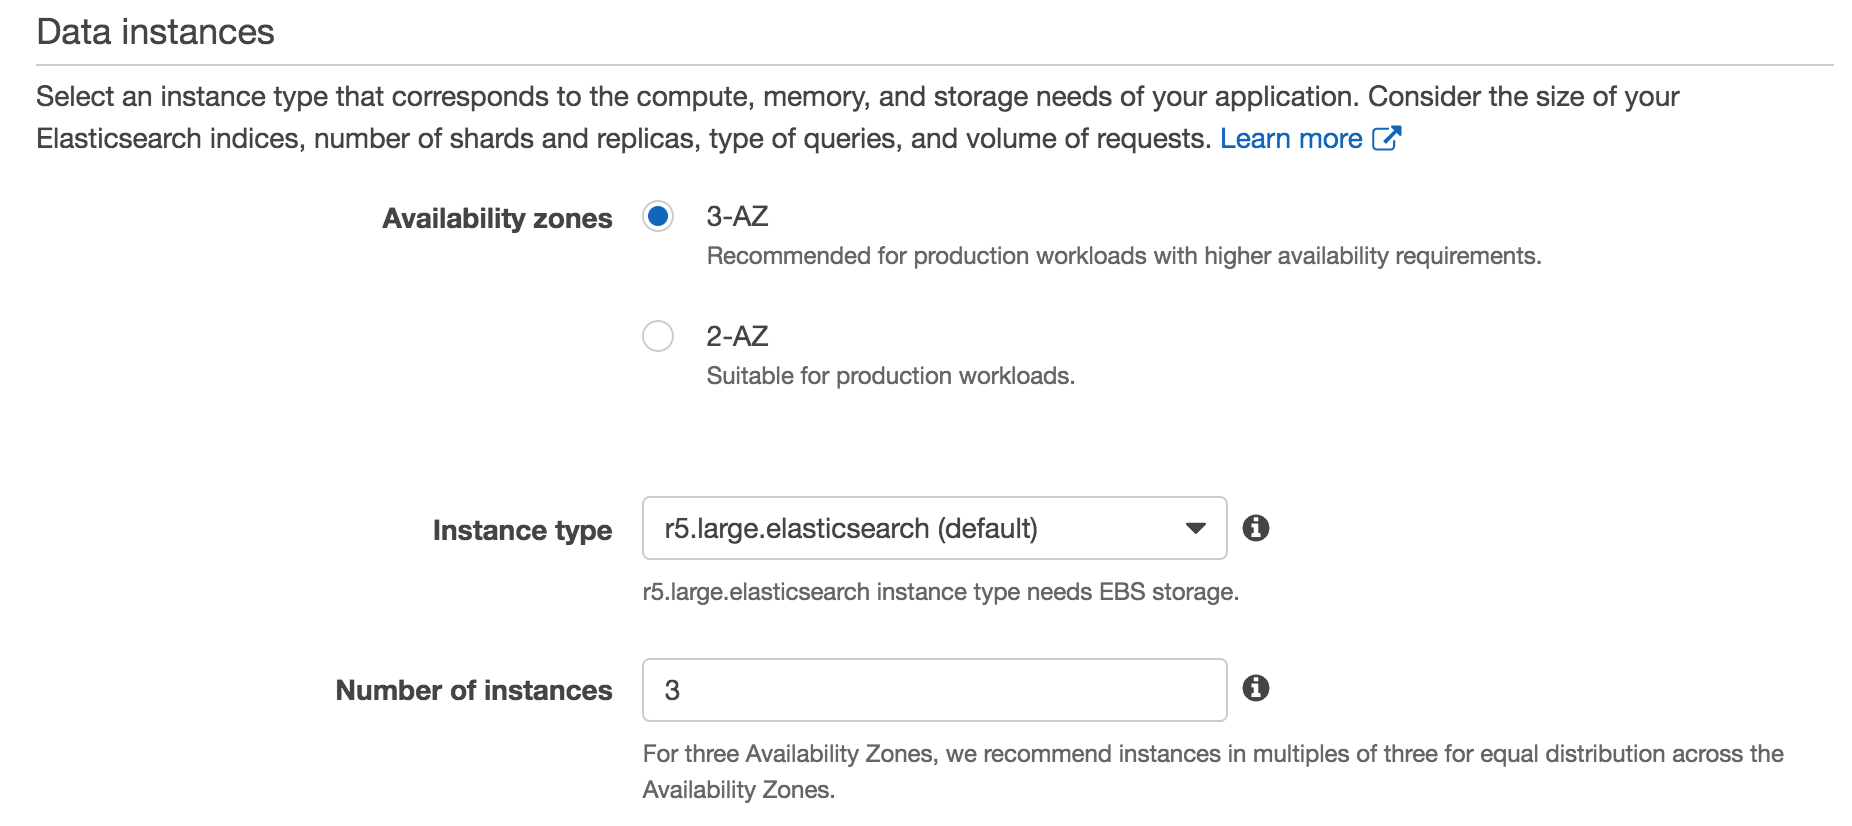
What AWS ES calls "data instances" are more typically known as Elasticsearch data nodes. Data nodes hold all of your indexes' document data (index shards), perform the indexing of those documents, and serve search queries. Data nodes form the bulk of your cluster - clusters scale horizontally by adding data nodes. A large cluster may have, for example, 3 master nodes, 3 coordinator nodes, and 80 data nodes.
Instance Type
While AWS ES offers you a wide selection of instance types, the de facto standard instance type for data nodes in an AWS Elasticsearch deployment for a wide range of use cases is i3.2xlarge. (link to the AWS docs that say this). i3.2xlarge's have 64gb of memory; and offer instance storage on NVMe SSDs, which is much faster and considered more reliable than EBS. Since Elasticsearch performs its own replication and makes its own availability guarantees, EBS's replication and availability guarantees are considered redundant or even counter-productive, while EBS's network overhead introduces risk and sometimes unpredictable latency. For write heavy applications, the i3 instance store is the best you can get on AWS.
Certain use cases do call for different instance types: logging, hot/warm architectures, etc. When your use case calls for large amounts of less-frequently accessed data, it might make sense to opt for EBS, since it works out to be roughly half the cost per GB than instance store. There are more cost effective EC2 instance types, such as the d series which offer large spinning disks, but as of this writing they are not available in AWS ES.
For testing purposes, i3.2xlarge is probably overkill; you should be able to get away with using the default r5.large.
Number of Instances
The number of instances, as with most Elasticsearch configuration options, is going to depend on a variety of factors. Each additional node provides added CPU and RAM for indexing and serving search requests, as well as added storage. In general, the biggest factor determining how many nodes you add will depend on your storage needs. If you opted for a production configuration with at least 2 AZs, then you will need at least two nodes to replicate across the AZs.
Dedicated master instances
Setting a dedicated master is optional for development, but required for production. Master node handles all changes to cluster state, such as nodes joining or leaving the cluster, changes to cluster settings, etc. Without dedicated masters, one of the data nodes will be elected master and will have to handle master node tasks as well as indexing and serving search requests. There is a risk that the node will not be able to handle both tasks, especially during an index spike, causing the cluster to go red when the node GC's or is capped on CPU.

Dedicated master instance type
For master nodes, we recommend r5.large. Unless you have a very large cluster state, or your use case requires constant changes to mappings and other cluster state changes, the 16gb of memory is typically enough.
Dedicated master count
There's only two options here: 3 or 5. Of the dedicated masters, only one will be elected master and the others will remain idle. If the elected master becomes unavailable, one of the other dedicated masters will be elected the new master. Unless you have extreme reliability requirements, we recommend going with the default of 3 master nodes.
Storage
Storage type
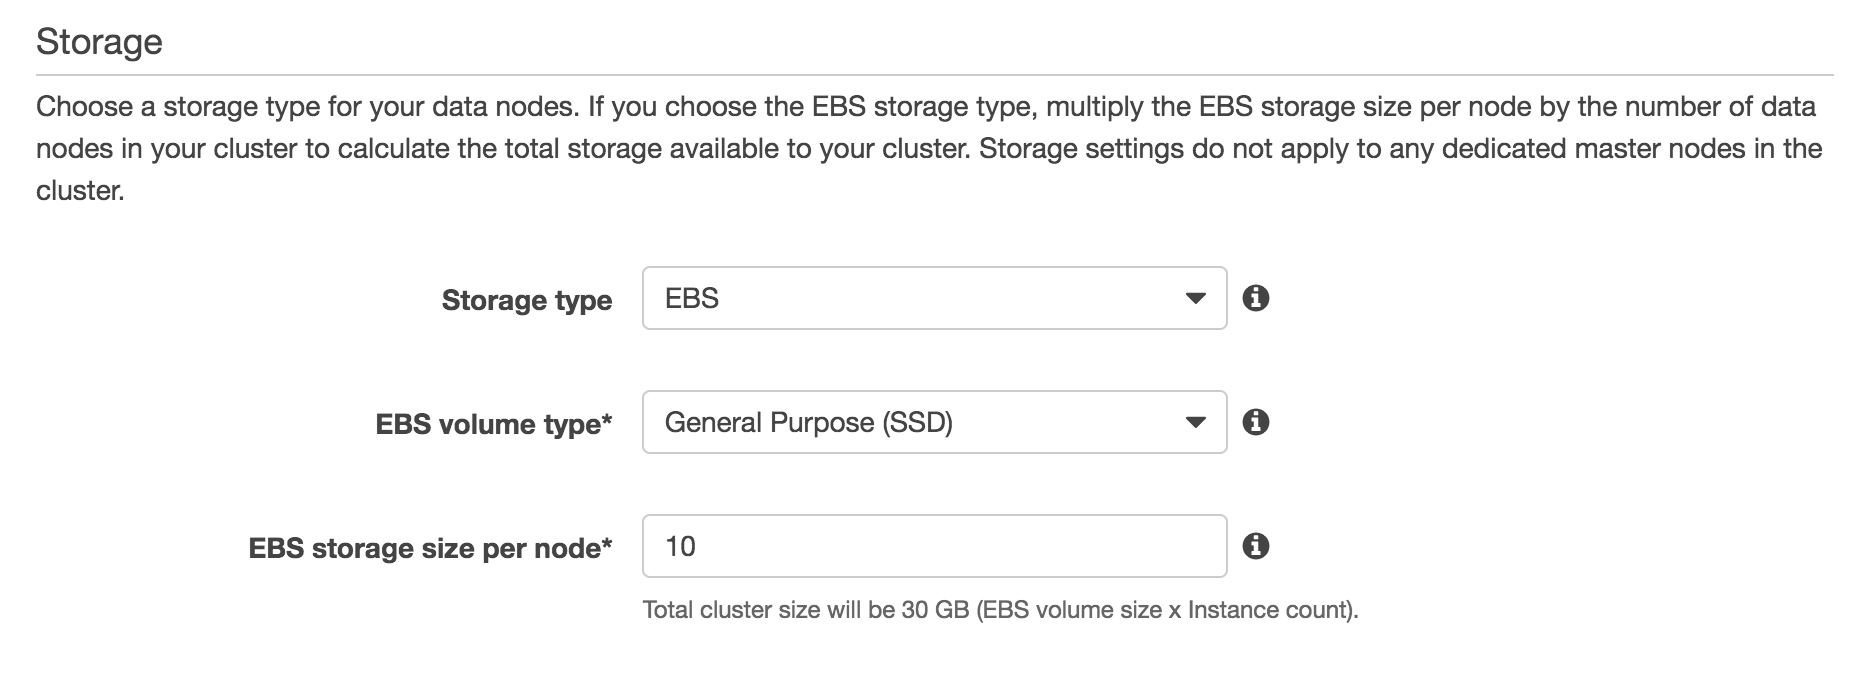
You can choose between EBS and instance store, depending on which data node type you picked. Instance store is the more performant option, because there is no network overhead when reading from disk, and you aren't limited on IOPS. EBS generally makes sense for high storage and low access requirements, since it is slower but about half the cost of instance store.
EBS volume type
If you chose EBS as the storage type, your options here are General Purpose SSD, Provisioned IOPS SSD, and magnetic. General Purpose can reach a maximum of 16,000 IOPS. IOPS scales from a minimum of 100, up to 16K at a rate of 3 IOPS per GB of storage. Running out of IOPS can be detrimental to a high IO use case like running Elasticsearch, so we generally don't recommend this unless you have low throughput requirements.
Provisioned IOPS means you calculate how many IOPS you will need ahead of time and provision it. If you chose EBS instead of instance store, we recommend using Provisioned IOPS.
Magnetic is the cheapest and slowest option. This really doesn't make sense to use unless you are cost conscious and have very low throughput requirements.
Amazon has a through review of EBS volume types here: https://docs.aws.amazon.com/AWSEC2/latest/UserGuide/EBSVolumeTypes.html
EBS storage size per node
Here you can set the storage capacity per node in your cluster. You should account for how many replica shards (copies of each shard) you plan to have when setting this value, since each additional replica will double storage requirements. Note that AWS Elasticsearch reserves 20% of storage capacity, up to 20GB, for administrative tasks.
Encryption

One of AWS ES's nicest features is their completely transparent offering of encryption-at-rest as a simple checkbox. In EC2, this is offered for EBS volumes, and they've extended that capability to AWS Elasticsearch Service. Impressively, they offer the same simplicity even when you've selected instance stores for your data storage.
If you enable encryption of data at rest, you will need to select a KMS key to encrypt the data. You can opt to use the default KMS key, but we recommend creating a separate key for increased isolation.
Your business needs typically dictate whether encryption-at-rest is desired. If you require SOC2 or HIPPA certification, encryption-at-rest will be a requirement. Encrypting instance stores on a self-hosted cluster is not-trivial, so thankfully AWS has made it as easy as checking a box.
Snapshot Configuration
"Snapshots" refers to Elasticsearch's built-in backup mechanism. AWS Elasticsearch offers simple snapshot scheduling configuration, as well as allowing you to manage snapshotting yourself. Automatic snapshots occur hourly for Elasticsearch versions 5.3 and later, and daily for versions prior to 5.1. Under the hood, snapshots are stored in an S3 bucket that is not accessible, you will need to access your snapshots via the Elasticsearch _snapshot API.
You can read more about this feature here: https://docs.aws.amazon.com/elasticsearch-service/latest/developerguide/es-managedomains-snapshots.html
Step 3: Set up access
Network configuration

You can choose whether your Elasticsearch domain is publically accessible, or only accessible within your VPC. It is much more secure to have your domain only accessible within your VPC, as a potential attacker will need to be within your VPC to access your data. You might opt for public access if you have resources outside of your VPC, such as in Google Cloud, and do not have a VPN configured. In this case, you will need to whitelist IPs that can access this domain. We strongly encourage using VPC access.
Kibana authentication

You can configure authentication into Kibana via Amazon Cognito. You'll need to create a Cognito User pool and Cognito Identitiy pool prior to setting this up. Amazon makes it relatively easy to configure SAML for Kibana access, something which is non-trivial to set up on a self-hosted cluster.
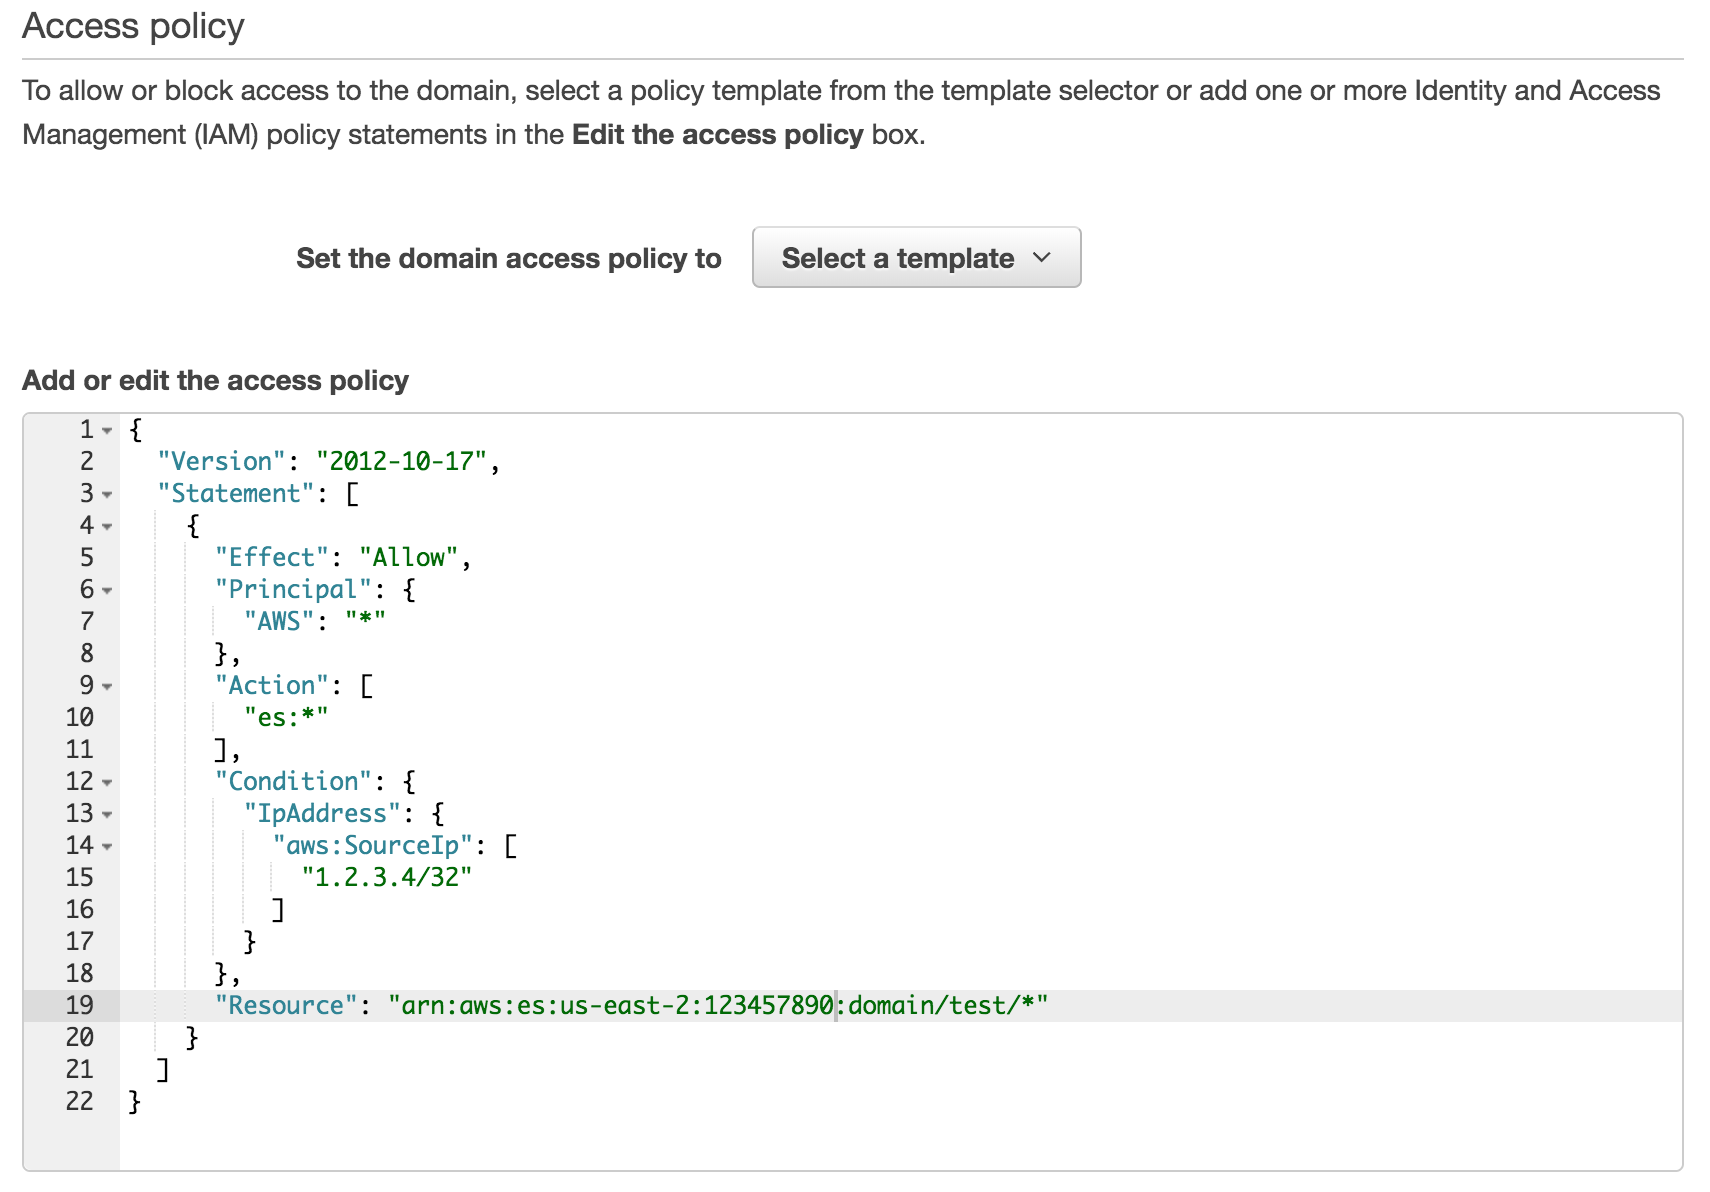
Access policy
In this step, you can set up IAM policies for accessing this Elasticsearch domain. You can pick a template that fits your needs, with options for allowing open access (strongly discouraged), denying access, or allowing access to specific IPs or CIDR blocks (as shown in the above example)
Step 4: Review
Here you can review all of the configuration choices you made, with links to edit sections if needed.
Once you click "Confirm", you'll be taken to an overview page for your domain.
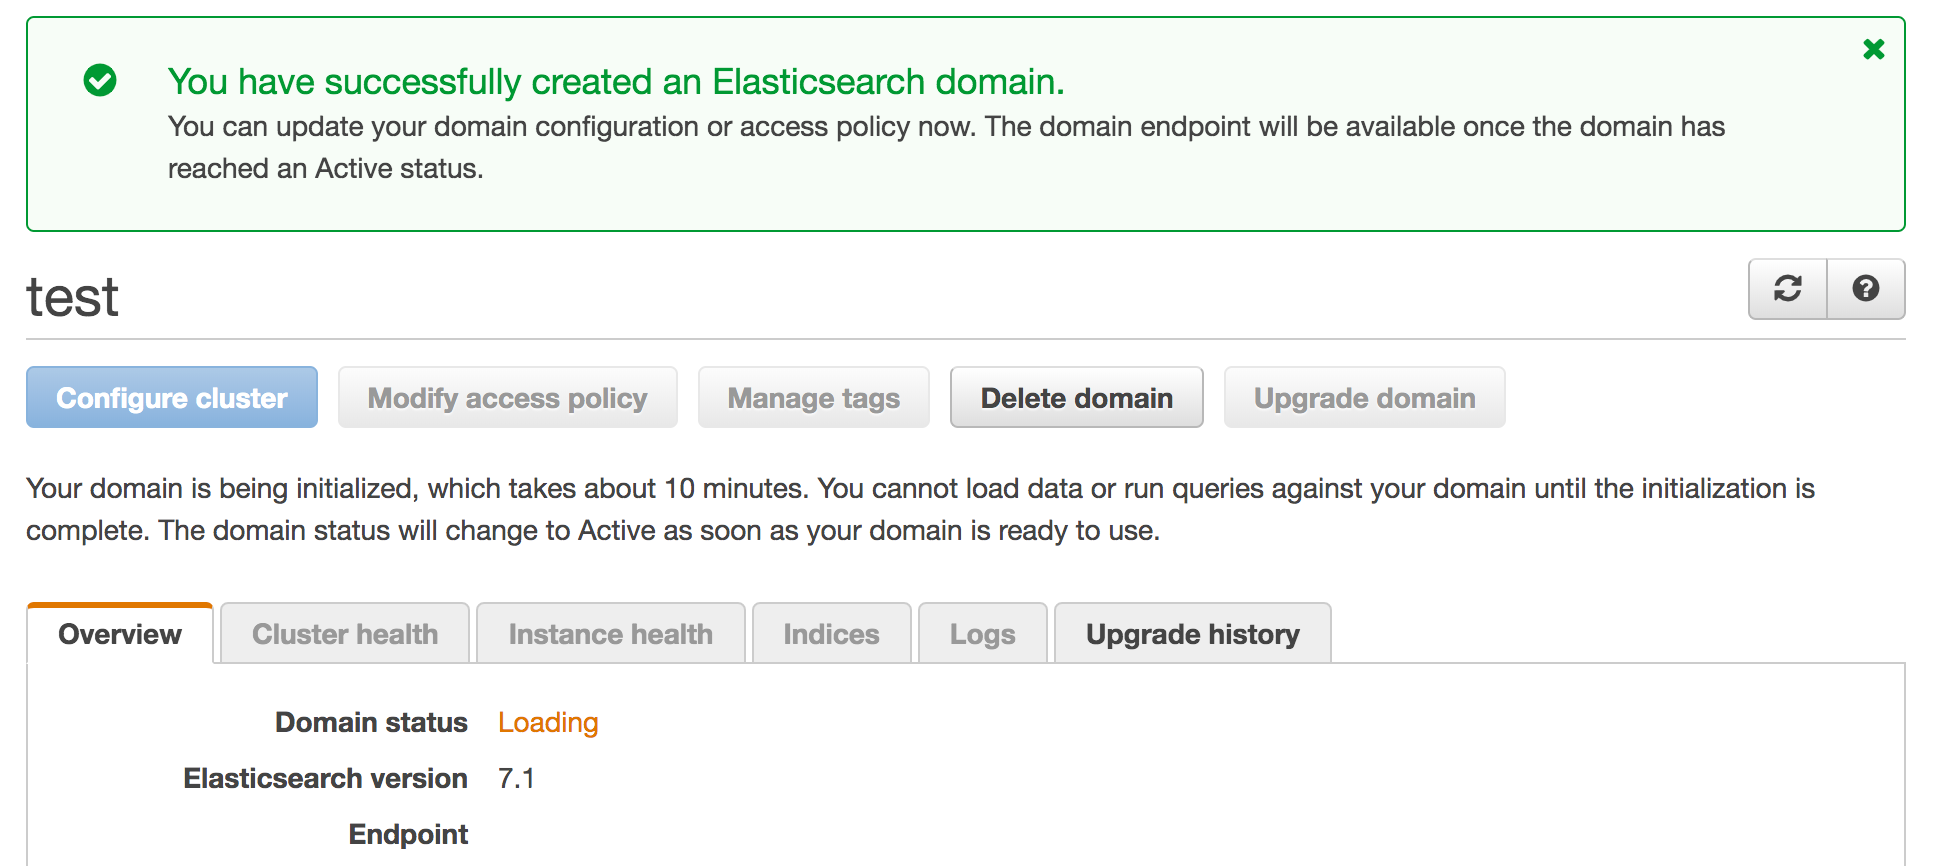
Domain status will show Loading while the domain is being set up, which takes about 10 minutes. The status will change to Active once done, and the Endpoint field will populate with the url for the domain. Accessing the endpoint via HTTP should show the following if everything went well:
{
    "name": "im4OgiN",
    "cluster_name": "1234567890:test",
    "cluster_uuid": "ydiiUHb8QYCrHZFBPYW0Ig",
    "version": {
        "number": "6.8.0",
        "build_flavor": "oss",
        "build_type": "tar",
        "build_hash": "65b6179",
        "build_date": "2019-06-15T13:06:07.540272Z",
        "build_snapshot": false,
        "lucene_version": "7.7.0",
        "minimum_wire_compatibility_version": "5.6.0",
        "minimum_index_compatibility_version": "5.0.0"
    },
    "tagline": "You Know, for Search"
}
The Kibana field will also populate with the Kibana endpoint.
Conclusion
Congrats! You've successfully set up your first AWS Elasticsearch domain. Depending on your use case, you might find that the settings you chose don't quite make sense, especially at scale. Configuring Elasticsearch is a finicky process. If done right, it can be the backbone of your data infrastructure and remain reliable even under high load. Done poorly, it can run extremely slowly, and in the worst case, lose data. Gigasearch is a team of Elasticsearch consultants and engineers with experience deploying petabyte-scale clusters. If you'd like professional support is setting up or configuring your Elasticsearch cluster, feel free to contact us at Gigasearch, we're here to help.

